DIY Faux Leather Earrings | Includes Free Cut Files
- Aubrey Barnes

- Feb 1, 2019
- 3 min read
Updated: Oct 19, 2019

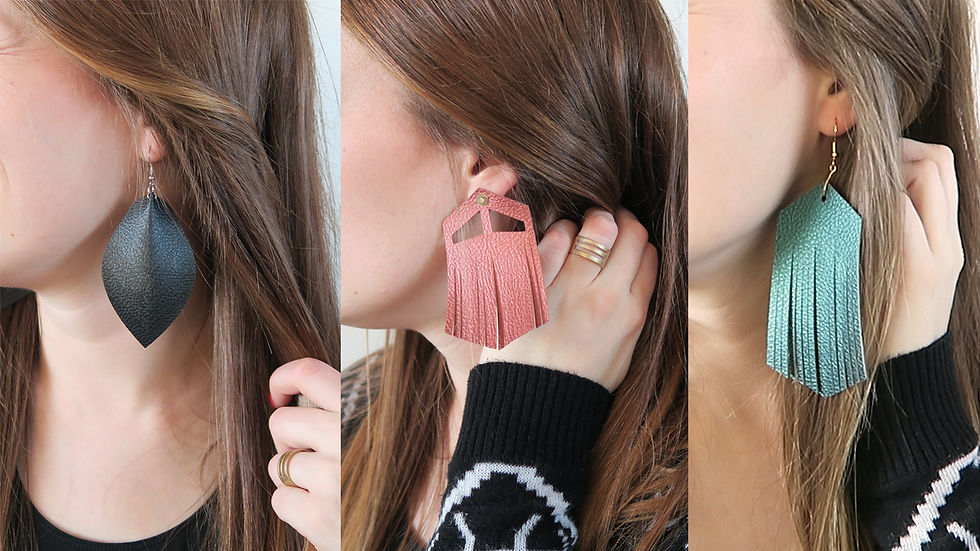
I have been seeing these Faux Leather Earrings around lately and I think it is such a genius idea! I love large dangle earrings however my ears cannot handle them for a long period of time so these are the perfect solution. You can literally wear them all day long and you won't even notice you have them in. Make sure to download the FREE SVG & PNG files!
Disclaimer: The links in this blog are things that I have purchased with my own money and recommend to you. *****As an Amazon Associate I earn from qualifying purchases*****
Here are the supplies you will need
Free Cut Files - Get them HERE!
Printable Pattern - If you do not have a cricut or other cutting machine you can still make these! Print the pattern HERE and you can cut them out by hand. I recommend a sharp pair of scissors and a razor knife for small details and to help with the cut outs. A small hole punch will come in handy.
Faux Leather - HERE is the one that I used. You can also use real leather with these designs you will just need a different blade for your machine that will handle a deeper cut.
Standard Grip Cutting Mat - THESE are the ones that I have. It is important that your cutting mats are clean and very sticky. I will get into this more later.
Earring Supply Kit - THIS is the one that I got and I love how many options it has. I'm constantly loosing the backs of earrings and it comes with tons of replacement options!
The first step is to download the FREE CUT FILES or create your own and get them uploaded into your cutting software. I have a Cricut so I will be referring to the Cricut Design Space during this tutorial.

Once the files are uploaded you will want to "ungroup" them so that you can size them individually. You can make these designs as big or as small as you would like. I will put below the size I made each one just for your reference. The only thing I changed from the originally uploaded SVG file is the height of the design. When resizing the designs with multiple pieces I selected all the pieces for 1 earring and then made the adjustment to the height so the size listed is the size of the largest piece.

Once you get the designs uploaded and sized you will want to choose your colors and group the designs by color. Next, load the Faux leather onto your mat. I would highly recommend cleaning your mat beforehand. I would also recommend doing a test cut. The sharpness of your blade and the tackiness of your mat will definitely play a roll in how well the faux leather sticks and cuts.
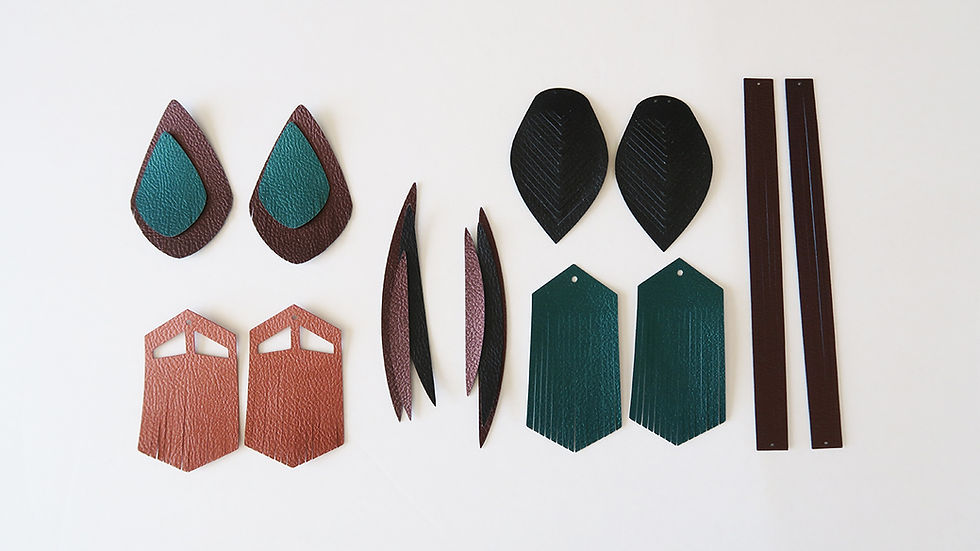
Here is what it looked like after the first cut. The faux leather moved around so much that I could not get a good clean cut. My mats are old and not very sticky so the material moved slightly when it was being cut. For the next cut I switched out the mat for one that had a better grip. I also taped the top and sides of the faux leather to the mat to help it stick better. This worked great and I got clean cuts after I made this adjustment. If you have newer mats this would probably not be a problem at all.

You will place the faux leather on the mat with the color side down.

Once your leather is placed securely do a test cut. The faux leather I bought had the depth settings in the instructions which was helpful. I have a Cricut Explore Air so I set my machine to the "Custom" setting and then selected "Faux Leather" in the program. I also found after a few cuts that the "less" setting on the pressure depth was plenty for a good clean cut.

Once all your designs are cut out it's time to add the earring hooks or posts. The earring kit I got from Amazon has so many different options. I'm constantly losing the backs of earrings so this kit is perfect for me since it comes will so many back up pieces.


And there you have it. I can't wait to cut these out in different colors and give them as gifts. I'm thinking they will make great Mothers Day gifts this year!
Check out the video below to watch the full process!
Disclaimer: The links in this blog are things that I have purchased with my own money and recommend to you. *****As an Amazon Associate I earn from qualifying purchases*****


I have made several of the earrings and they turned out great. Is it possible to eliminate the slices in the designs?
There is a way to do it however you would need to adjust the SVG file and edit out the slits. It's really not that hard but you do need to download a program called inkscape. It is a free software that I've been using to make SVG files. I'm still practicing in it though so I'm not quite sure I'm ready to do a tutorial on it. There may be a way to do it in the Cricut design space but I haven't figured it out yet. Maybe see if there is a video on youtube about it?
Downloaded the earring file. Love them all. Have made several pairs. Just wondering if the black leaf shape with the slits, is there a way to do them without the slits cut in the?
Hey Cori, It's working on my end. What seems to be the issue?
i just tried again, still not working. I'll keep checking. Thanks :)